It’s your information — use it! Part 2
 This is the second article in the series on getting more out of RB9 by using Query Maker.
DIY reports
With Query Maker you can create your own RB9 reports that provide information from your RB database that you can’t get from the existing RB functions. You can export your custom reports to Excel or as comma separated values (CSV) files to import into other applications. You can also save your queries to reuse later.
If you are not a programmer Query Maker can seem daunting so we have created some demonstrations of ways to use Query Maker to get more out of your RB9. We hope these examples will encourage you to develop your own custom reports in Query Maker.
Find contacts who haven’t used RB Connect in a while
If you have RB Connect you can use the Activity Log to see how active your clients and resources are on it. It shows the activity for all contacts or all resources in the time period specified.
The Activity Log function only allows you to filter activity by entity set (Contact or Resource) and date range. If you want a more targeted report to see only those contacts who haven’t been using your RB Connect lately, use Query Maker.
In this article we create a report that lists all active contacts that haven’t used RB Connect this year. We include their name and other important information — like when they last logged into RB Connect — so we are prepared when we reach out to them.
With this list we can contact valuable clients and offer them assistance — one on one or maybe with Zoom or YouTube classes — and/or a one-time discount or other enticement to try RB Connect again.
IMPORTANT: For this report we filter out any contacts who do not want us to market to them so they won’t appear in this report. We don’t want to bother anyone when we are trying to become their top of mind service provider.
 Step-by-step setup
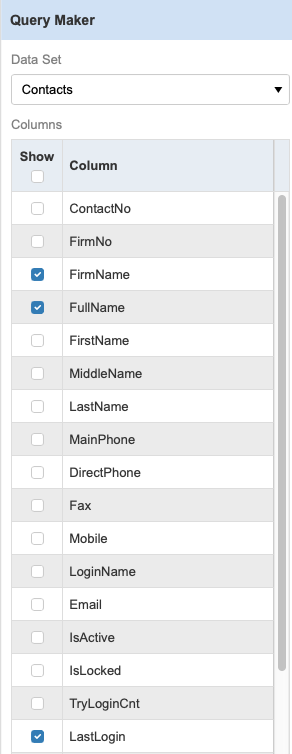
- In Tools > Query Maker’s left panel, choose Contacts as the Data Set.
- Uncheck the Show box in the Column header to deselect all.
- Check boxes for:
- FirmName
- FullName
- LastLogin
- Other useful identifying and notes fields
- In the right panel under Conditions set your query conditions: In Column select “LastLogIn.”
- In Operator select “is less than.”
- In Condition select a cutoff date for RB Connect inactivity. In our example we select the first of the year.
- We have 2 more filters we want to add for our targeted list: We want active clients who are open to receiving marketing pitches from us. Click the blue down arrow button and select Add New Condition.

- Select “AND” in the AND/OR drop-down to start a new filter.
- In Column select “IsActive.”
- In Operator select “is equal to.”
- In Condition select “True.”
- For the 3rd filter, repeat steps 7 and 8, then in Column select “IsNoMarketing.”
- In Operator select “is equal to.”
- In Condition select “False.”
- Click Execute. Under Result RB9 displays active clients who haven’t used RB Connect since before the date in Condition.
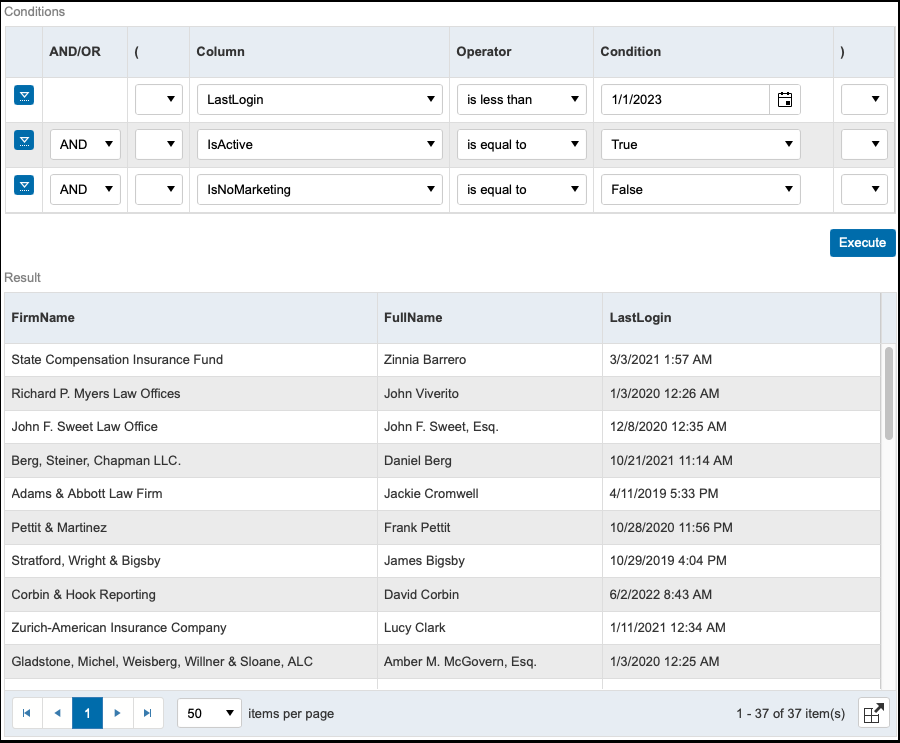
- Click the LastLogin header to sort the list by that column.
- Revise your query if needed. For example check or uncheck selections in the Data Set panel to change which columns appear in the report. You cannot change the order that columns appear in your report so we recommend including only those columns you need for the report to be useful to you. Then click Execute again.
- You can shrink the width of any columns to save space. When you’re satisfied with the results, you can start using your report. (You can also export results as Excel or CSV to save to use later.)
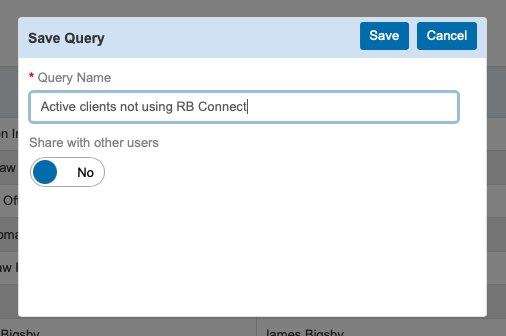
- To save your query to reuse later click Save at the top of the right panel, name your query, and click Save again.
Using the report
Query Maker results are not interactive. To use the results in RB9:
- Keep the results open in Query Maker and open the Contacts function under Entities.
- Copy a contact’s name from Query Maker and paste it into the Full Name field in Contacts. Then click Search.
- Click the hyperlinked contact name in the results so you can email them or send a text message from within RB9, and to access the rest of their contact info and other information.
Note: When to use AND/when to use OR
In the last Query Maker Step by Step we used OR when adding new conditions. In this lesson we used AND. So how do you know which one to use?
It might seem counterintuitive but use OR when you want all the results that fit any of your conditions. Use AND when you want only results that match all of your conditions.
AND = Results must match this condition and the previous condition(s).
OR = Results can match this condition or the previous condition(s).
If you have any questions contact RB Support.
Listed under Customizing RB9, RB9, ReporterBase Tagged Query Maker, RB9, Tools